
How to Post Pictures
When you are creating a new post, you need to have the URL (web address) of the image you want to use. An easy way to do this without having a place to post your own photos (Aral and Jevanking can tell you about that) is to find them on the internet and just “point” to where it is.
In case you haven't already used Google's Image search, I'm starting from scratch:
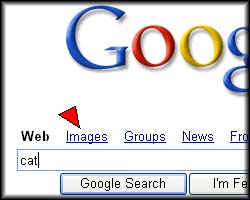
Go to Google.com and click on "Images" and do the Google Search
The next page will give you many options to chose from
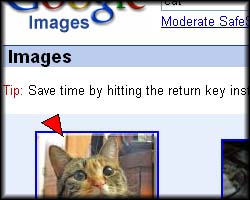
Click on any of them. The next page will show you (on the bottom portion) what the page that the image is used on looks like. If you click on the image or "See full-size image" you will get to a page that has ONLY the image on it.
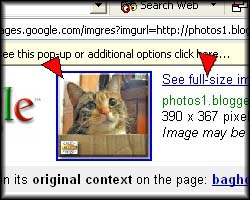
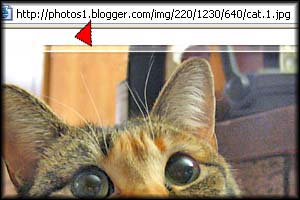
The address is what you need (see the top where the red arrow/triangle is pointing)
You need to sandwich the address with a few elements, which I can't type here because the internet will try to follow the command. Basically, it's Bracketimgspacesrc="entire_web_address"Bracket

The cat's image file is named cat.1.jpb -- jpg indicates the type of image file, common on the internet, along with bmp. All coding commands have to have brackets in the beginning and end. All those slashes indicate that the image is stored in various folders (i.e. cat1. jpg is in a folder named 640, which is in a folder named 1230, which is in a folder named 220 ... etc.)
All of this can be done within the "Compose" way of creating a new post. The following needs to be done within the "Edit HTML" method:
Now, you have to mind what the image's size is, 'cause some out there are really large. You can resize an image by inserting width="xxx" height="yyy" between the img and the src.
The image will automatically be to the left side unless you also put align="right" or align="center" between the img and the src. OR, if you click on the image (once you can see it) then you can choose to have it centered or to the right by clicking one of those options above your post-entering box (where the b or i and text color choice is)
The #3 image above told me that the image was 390 x 367 pixels. That converts down to 200 x 188 (I cheat and use Photoshop to give me the proportionate downsize). So I was able to get this image down to a size that I wanted. (I try to keep the images around 200 or 250 pixels in width so that they don't mess up my right hand side list of links and pics.)
Does this make sense? A good website to find out more about web page coding is htmlgoodies.com.Then you just place this coding within the text that you are using. Play around with it and see what happens.
Changing the whole Template of your Blogger page is more difficult. Look at other blogs. If you see one that you'd like to emulate (heh heh - copy), click on "View" at the top of your page, then down to "Source". Not every page will let you see the source code, but if it does, take a look at it. Compare it to your blog's code, or another's code. See where the differences are. Now, if you don't care about the top bar that Blogger provides and the rest of the features, then you can do whatever you want. But I'd advise trying to keep the top bar there.
Before you make any changes to your blog's code, cut'n'paste it all into a Word doc or Notepad and save it. That way you can bring it all back in case you mess up or change your mind.
posted by dddragon at 12:41 PM
![]()


9 Comments:
Wow, what a valuable service you're doing! Great job! You could be a technical writer... decent pay, ya' know.
DDDragon's Tech School.
I found an easy way to do all this without having to know what I am doing.
1. Obtain a pirate copy of Frontpage. Do not feel bad about stealing it, Microsoft is not hurting for money.
2. Start Frontpage, and open a new page.
3. start typing. When you want to add a picture, click insert, then picture, then from file, then enter the URL of the photo.
4. When you are finished, go to HTML view. Select everything. Cut it. Then paste it into the blog spot post editor.
5. Select "preview" before you publish, to see what it looks like.
Barbara said that she needed some guidence in posting pictures, I was hoping this might help. I've never used Frontpage 'cause our ISPs didn't support it (learned cold, hard coding back when the internet was new, but it has far surpassed me now).
Bless YOU!!!!!!
A step by step exercise on how to post pictures. This is just my style.
I am eternally grateful. Now, let me see if it works!
bfc
lol, I'd hurt for some of that money.
Barbara, you're so busy stirring up "trouble" on your blog, you don't have time for pictures!! You exhaust me!
Good instructions. jevanking sent me good instructions too. I just have to try to understand it all and see if I can do the exercise of "where you were raised" etc.
dddragon,
I know what you mean! I have been exhausting myself lately too. But I am showing my husband these instructions today so he can help me.
Thanks again for this step by step lessson!
wow - this is really helpful - thanks!
but i'm confused: is this ok in terms of copyright law?
Post a Comment
<< Home